Table of contents
/brief
This page resumes the procedure I went through to set-up my theme-console website. It includes the setting up of the jekyll static generator environment, jekyll template, host it on Github, get a domain and finally configure the DNS.
Motivation
- Have a static website to post whatever I am working or worked on;
- To produce documentation and share it with the hackers out there;
Jekyll
The first step is to create a static website from scratch (sort of). To do that I used Jekyll. Jekyll is a static site generator, much like Hugo or any other available out there. You give it text written in your favorite markup language and it uses layouts (default or custom) to create a static website. It is Github pages compatible, making it a perfect candidate to start with.
» Environment Set-up
To start, I installed on my machine the full Ruby development environment (Jekyll is written in Rub -> Ruby Gem). I set it all up on my Ubuntu 16.04 machine, W10 worked as fine using WSL and this link to install ruby version > 2.4 (required). Having done that, create a template jekyll site with the following instructions.
# Install Jekyll and bundler gems
$ gem install jekyll bundler
# Create a new Jekyll site at ./myblog
$ jekyll new myWebsite
# Change into your new directory.
$ cd myWebsite
The content of this folder should look like this:
$ ls -l
total 12
-rwxrwxrwx   404.html
-rwxrwxrwx   about.md
-rwxrwxrwx   _config.yml
-rwxrwxrwx   Gemfile
-rwxrwxrwx   Gemfile.lock
-rwxrwxrwx   index.md
drwxrwxrwx   _posts
» Build and Serve it
Now, build and serve the website:
$ jekyll serve --watch --port 8000
Open your WebBrowser and you should see this:
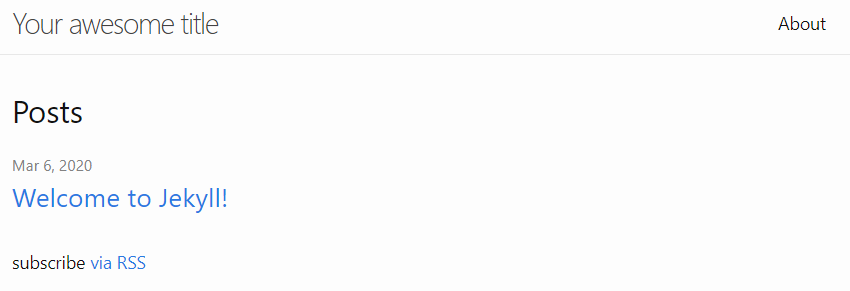
Great, we have created a static website using Jekyll.
» Theme-Console
When a new Jekyll template site is created, by default it comes with the minima theme installed. The user might freely decide to pick some other theme (and there are a lot, really). Here you can check out some of them.
I picked a Jekyll template available on Github. To install it and be able to build and serve it locally, I went through the README.me file as such:
- Add the following line to your Gemfile:
gem "jekyll-theme-console" - Fetch and update bundled gems by running the following Bundler command:
$ bundle - Set theme in your project’s Jekyll _config.yml file:
theme: jekyll-theme-console - Finally, update the theme and serve the website:
  $ bundle update
  $ jekyll serve --watch --port 8000
Open the browser and verify you have the following window:
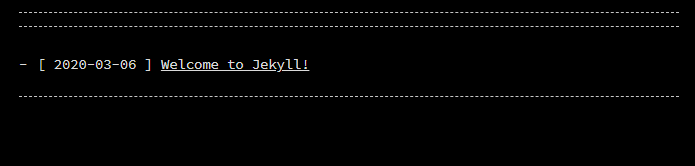
Having the theme-console template up and running I started to customize it. For adding header content, I added the following to _config.yml:
header_pages:
  - index.md
  - projects.md
  - tutos.md
  - about.md
  - contact.md
Note that the index.md, projects.md, etc. are markdown files on the /root directory.
For the footer I added the following line on _config.yml:
footer: '<a href="/CV">CV</a> <a href="https://github.com/marcoroda" target="_blank">Github</a>'
» Collections
By default, when the jekyll template website is created, there is only one type of collection (_posts). Collections are a great way to group related content like projects, tutos or talks at a conference.
» » _posts Collection
If you inspect the markdown file under _posts/, you will see that at the top of the file there is the following:
---
layout: post
title:  "Welcome to Jekyll!"
date:   2020-03-06 16:23:13 +0100
---
This tells the jekyll Ruby engine the layout (‘post’ which is the default one), title and date. If we want the markdown files under the _post dir/ to be rendered automatically by Liquid under a specific static page (or markdown file) we create a projects.md file with the following content:
---
title: /projects        # the title of the static page
layout: home            # layout to be used
permalink: /projects    # link to the *project.md* file
---
Here we tell jekyll that for this page, go to the _layouts dir and render the code on it.
» » _tutos Collection
I wanted to create another type of collection to display different content. I started byt creating a _tutos collection. To do that I added the following lines to my _config.yml:
collections:
  tutos:
    output: true
Then create a dir/ non the root of the website “_tutos”. Add a markdown file very much like the one we have already under the _posts dir/. The following lines need to be placed on the beginning of the .md file.
---
layout: post
title: marcoroda.com Setup
date: 2020-03-05
published: true
---
Now we create a tutos.md under the the root dir/ and tell jekyll to render whatever is on * _layouts/tuto.html*. On that html file we have a liquid template fetching and displaying all the tutos available.
Host on github
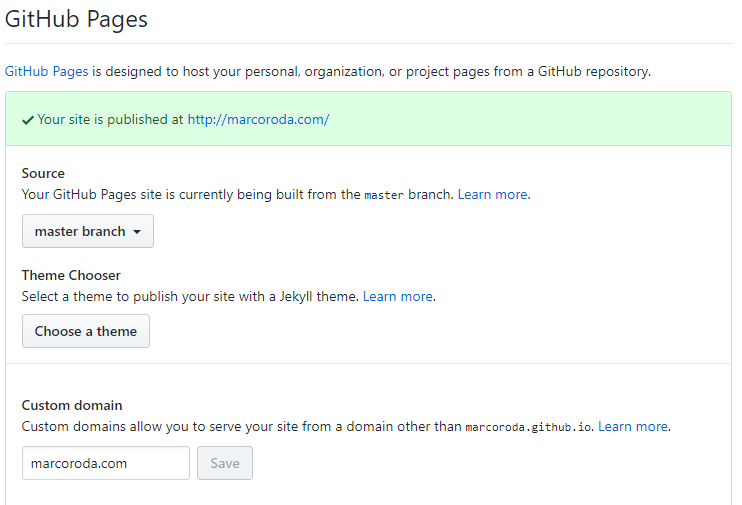
Github makes it very easy to host static website through Github pages. Create a github repository and under settings enable Github pages, choose the branch from where the website is going to be built and press save. Set-up the git repo locally and set the remote. Finally push it to github and you are done.
In order to be able to run the website locally, the following line needs to be added to the Gemfile. Comment it out when pushing to github.
gem "jekyll-theme-console"
If all goes as expecte you should have your website deployed under https://«your-github-username».github.io/«your-website-repo-name»/
Get a domain
One can buy a domain and have the website still hosted on github. I bought my domain (marcoroda.com) at godaddy. To let github know about my domain I have created under my website repo’s root a CNAME file with the URL domain in it. Also, under the website github repo settings, you have a field where you enter the domain name.
Configure the DNS
To configure the DNS I used CloudFlare. Why do we need a DNS in the first place?
Domain Name Servers (DNS) are the Internet’s equivalent of a phone book. They maintain a directory of domain names and translate them to Internet Protocol (IP) addresses. This is necessary because, although domain names are easy for people to remember, computers or machines, access websites based on IP addresses.
» Account on CloudFlare
My set-up uses CloudFlare to manage the DNS. There are plenty of DNS services out there. No need to stick to this one, you can pick the one you want. CloudFlare is completely free and thhey claim to be one of the fastest to resolve the DNS name in the market. Also you can configure and buy addictional DNS servers so that if your website traffic has a peak it can handle it easily.
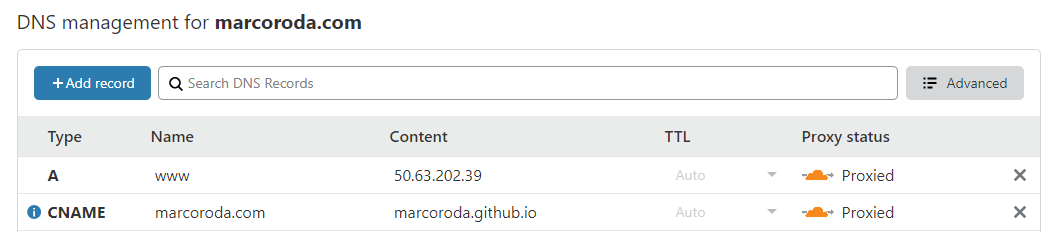
» CloudFlare DNS managment
Being a proud owner of a domain, you can head to cloudflare and first add a website and second configure the DNS. To do so you will have to add the CNAME type. Follow this github help article on how to do it. This usually takes some time to be effective. Be patient.
Wrapping up
With all the above steps done, hopefully you managed to set up your own website with your own domain. Static websites are again gaining a lot of popularity. No need for server side applications, such as backend and databases. You have totally control over with no cost whatsoever, almost, you still have to pay for the domain (if you like).
Comments
Leave a comment and/or suggestion on this post.