LoRa node talking to TTN and Node-Red Dashboard
Table of contents
/brief
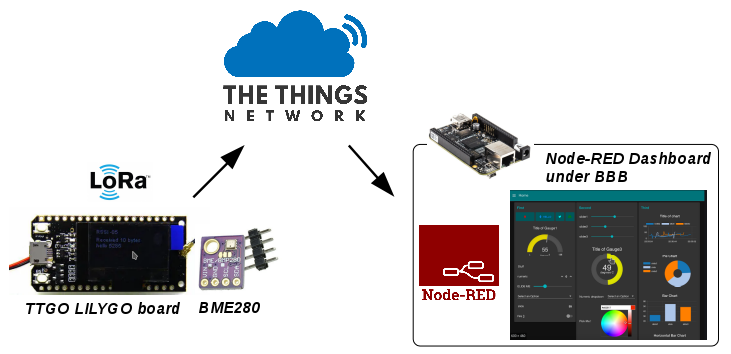
On this project a TTGO LILYGO LoRa32 module is used to interface a BME280 sensor. The sensor payload is then sent over LoRa and captured (hopefully) by a TTN Gateway displaying the data under the TTN Platform. To make it easier to read the sensor data and to access it with a fancy dashboard within your Home Network, a Node-RED app deployed under a BeagleBone Black is used.
Tech Stack: LoRa, C/C++, JavaScript, npm, Node-Red and Embedded Linux.
Motivation
- Prototype an IoT device to monitor temperature, pressure and humidity data;
- Make the sensor payload available to TTN using LoRa;
- Show sensor data using Node-RED dashboard.
Prototype
To prototype the main idea I will be using hardware that I already own, and later on produce a custom PCB with a M0 ARM uController, LoRa transceiver, add a solar panel and enclosure it on a nice case.
» Hardware
The HW used for the prototype is the following:
| HW dev. Board | What | Function |
|---|---|---|
| LILY TTGO LoRa32 module | Dev. board based on ESP32 uController, contains an OLED display and LoRa SX1276 transceiver. | Read out BME280 sensor values, process and sent them out using LoRa. |
| BME280 sensor | SPI slave Environment sensor | To measure temperature, humidity and pressure |
| BeagleBone Black | Single on-board Computer | Running Node-RED app under Debian |
» PlatformIO IDE set-up
For flashing the TTGO board I used PlatformIO IDE. It is an extension you can easily add to your Visual Studio code installation. The main advantages of using it are:
- Arduino compatible;
- Easy to manage and install dev-boards and libraries;
- Supports debugging through openOCD;
- C/C++ Intelligent Code Completion;
- Multi-projects workflow with multiple panes.
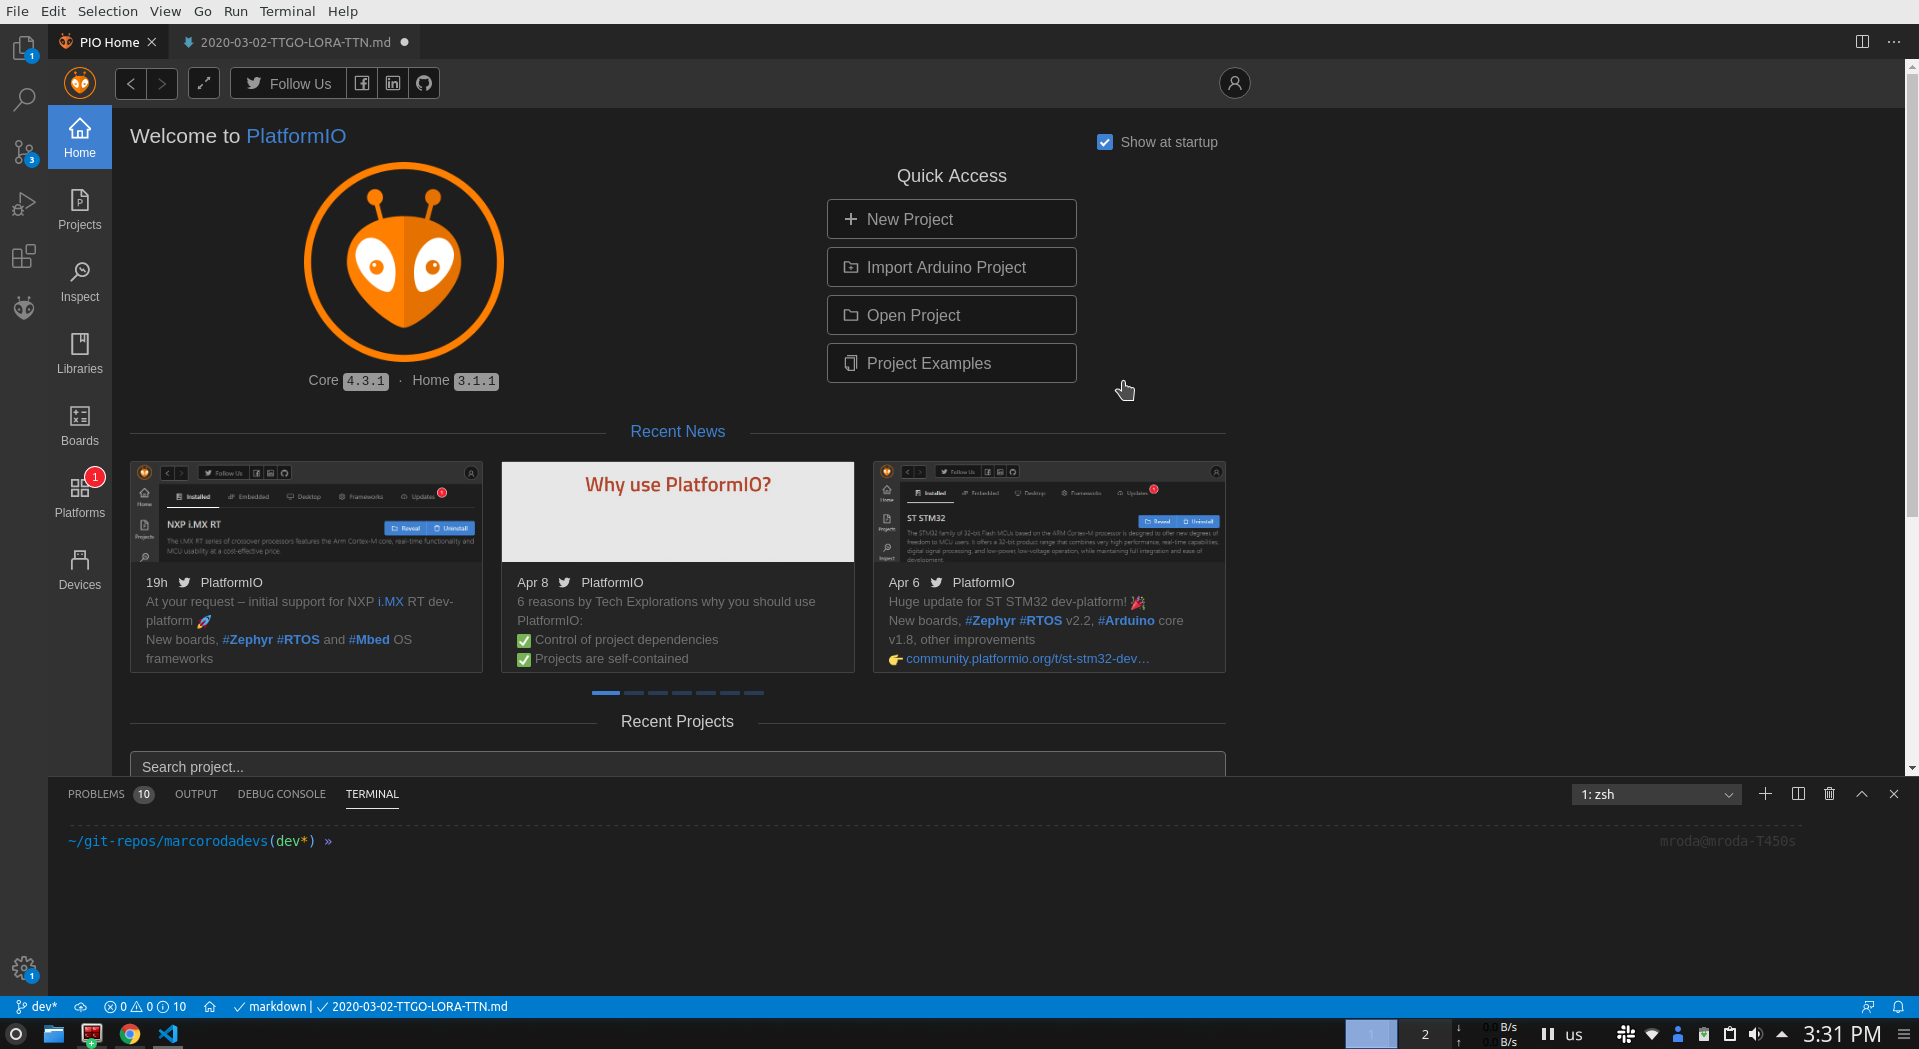
To install it, goto Visual Studio Code and under extensions (ctrl + Shift + x), type “PlatformIO IDE”. Install it and restart Visual Studio Code. Next time you open Visual Studio code, a PIO Home tab should open by default. Take your time to explore it.
» Install Board and Libraries
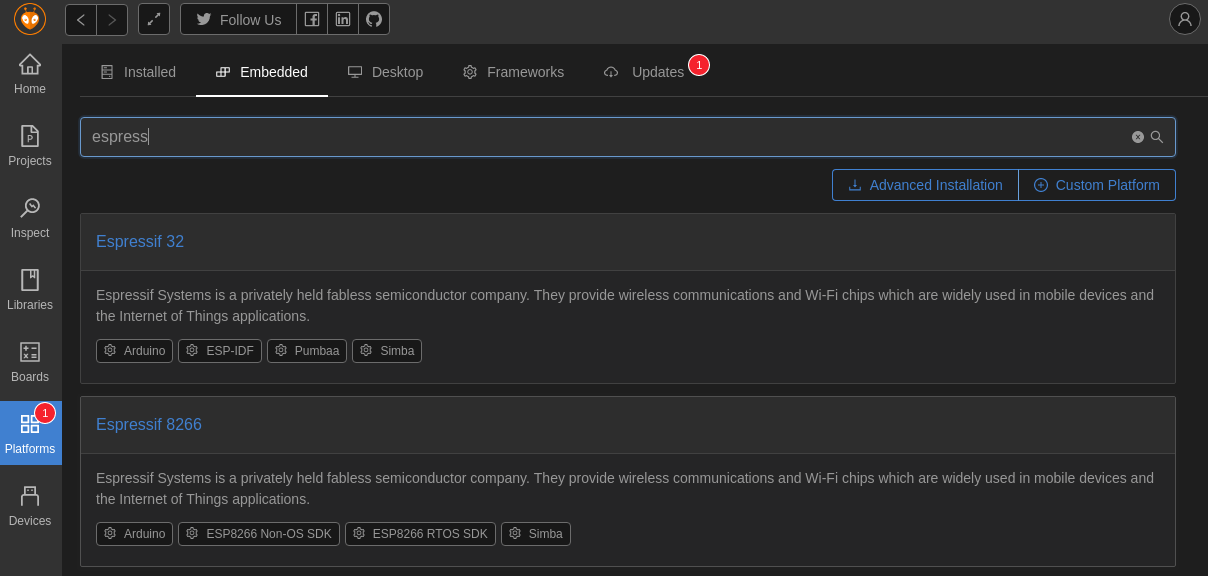
One needs to install the TTGO LoRa board into PlatformIO before being able to flash it. To install the board, goto PIO Home > Platforms > type “espress”. Two platforms should come up, install both and you will also be able to use boards that contain the ESP8266 chip. By installing the platforms, you will also be installing the boards.
Once the boards are installed, it’s time to install some third-party libraries so we can use the peripherals on the TTGO board.
| Library | Description |
|---|---|
| SSD1306 by Adafruit | SSD1306 OLED display driver library for monochrome 128x64 and 128x32 displays. |
| BME280 Library by Adafruit | Arduino library for BME280 sensors. |
| LMIC-Arduino by IBM | Arduino port of the LMIC (LoraWAN-in-C, formerly LoraMAC-in-C). Library slightly modified to run in the Arduino environment, allowing using the SX1272, SX1276 transceivers and compatible modules (such as some HopeRF RFM9x modules). |
» TTGO Board Bring-up
With the PlatformIO IDE set-up, cd into the dir/ where you want the Project to be at and clone it:
$ git clone https://github.com/marcoroda/TTGO-LoRa32-weather-station.git
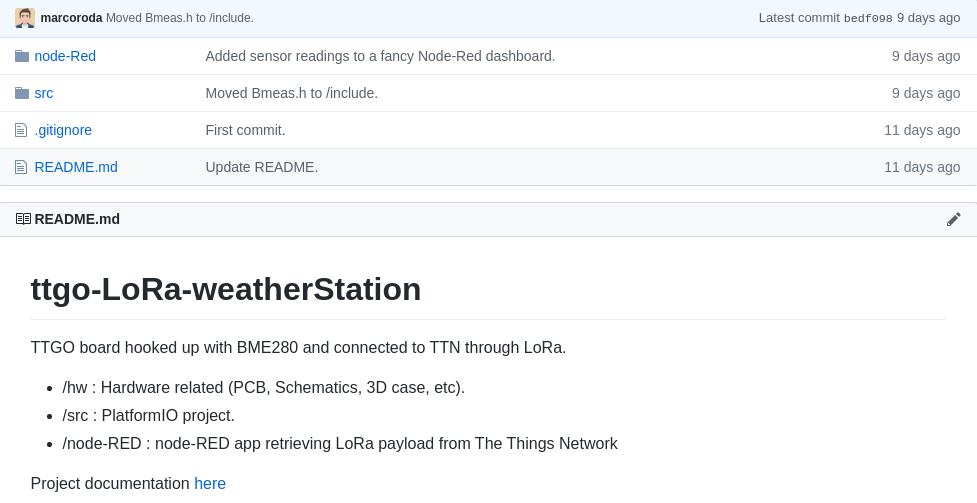
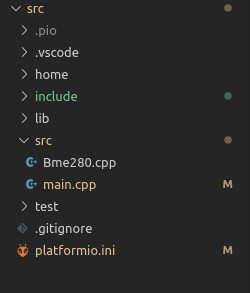
The Git repo structure is the following:
Open the src folder using the PlatformIO IDE. Goto PIO Home > Projects > Add Existing Project. When done you should see the Project under the current workspace tab on the left.
The Git repo structure is the following:
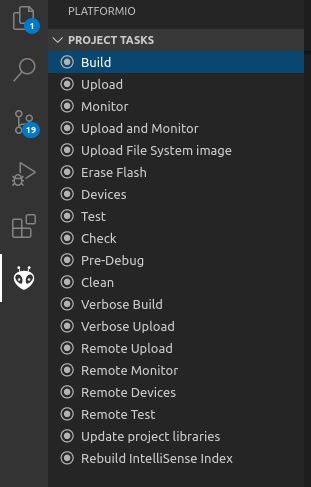
Click the platformIO icon and press build.
If all goes as expected you should see the following build result.

Give it a try and upload the SW into your TTGO board. You will need to configure the platformio.ini file with the correct COM port.
» BME280 Interface
For the time being, as I am still waiting for the BME280 board to arrive I am sending dummy values over LoRa. I have coded a simple BME280 Class. At the time of object creation, the default constructor initializes the members with dummy values:
class Bme280
{
private:
    /* sensor data */
    float temperature;
    float humidity;
    float pressure;
public:
    Bme280();
    ~Bme280();

    uint8_t init(void);
    void printBmeValues();
    /* GETs and SETs */
    float getTemperature(void);
    float getHumidity(void);
    float getPressure(void);
};
#include "Bme280.h"

/* Default Constructor */
Bme280::Bme280() : temperature(32.12), humidity(70.3), pressure(101.325) { }
» OTAA & LoRa Payload
The core SW of this application was taken from the OTAA example (Over The Air Authentication), where the LoRa node will try to connect with The Things Network. Once this is done, the sensor payload is sent over LoRa using LMIC_setTxData2() function.
/* Passing cnt which increments by 1 when a new payload is sent*/
LMIC_setTxData2(1, gen_TX_msg(cnt), LEN_PAYLOAD, 0);
The function that builds up the payload message is shown bellow. The integer part of the float sensor values get converted into an int16_t and multiplied by 100. Then the first byte goes into buffer[0] and the second byte to buffer[1]. This procedure is repeated for the humidity and pressure float values. On the TTN side, a javaScript function is used to decode the payload message sent by the LoRa node.
/*! @brief  Returns a pointer to the payload data to be sent over LoRa
 *
 */
#define NBR_MEAS            (3) /* Number or meas to send over LoRa to TTN */
#define LEN_MEAS_BYTES      (2) /* number of bytes it takes each sensor meas*/
#define LEN_PAYLOAD         ( NBR_MEAS * LEN_MEAS_BYTES )

uint8_t* gen_TX_msg(uint8_t incr)
{
    /* LoRa payload array message */
    static uint8_t payload_lora[LEN_PAYLOAD] = {0};

    /* Get sensor values */
    float temperature = bme280.getTemperature() + incr;
    float humidity    = bme280.getHumidity() + incr;
    float pressure    = bme280.getPressure() + incr;

    int16_t celciusInt  = temperature * 100; // convert to signed 16 bits integer
    payload_lora[0]     = celciusInt >> 8;
    payload_lora[1]     = celciusInt;

    int16_t humidityInt = humidity * 100;
    payload_lora[2]     = humidityInt >> 8;
    payload_lora[3]     = humidityInt;

    int16_t pressureInt = pressure    * 100;
    payload_lora[4]     = pressureInt >> 8;
    payload_lora[5]     = pressureInt;

    return payload_lora;
}
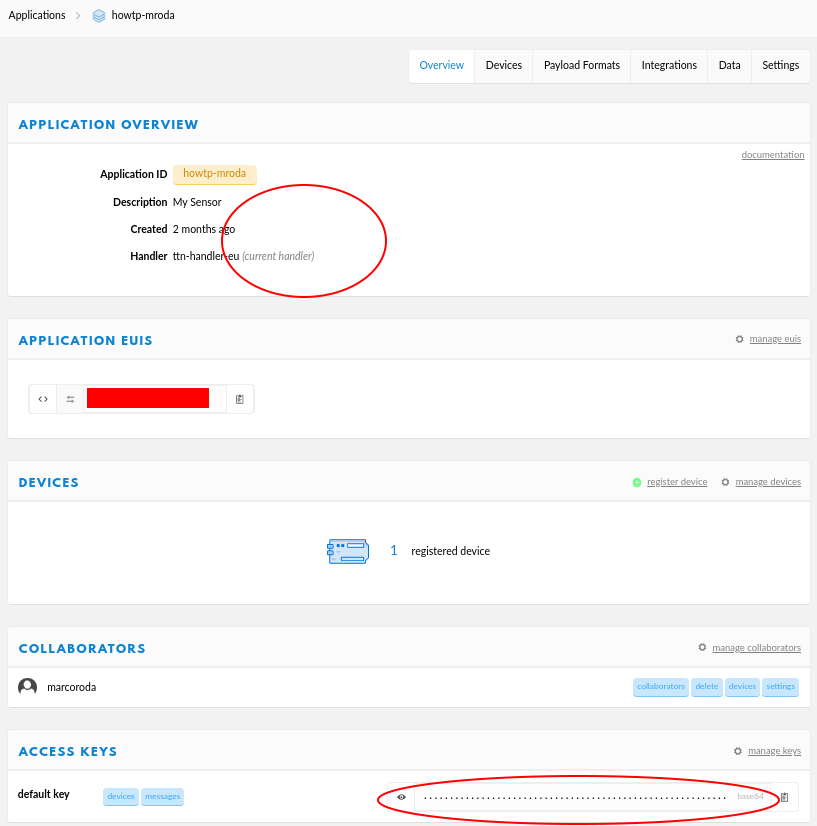
At program execution, the LoRa node tries to connect and authenticate itself with the TTN platform. The Device EUI, Application EUI and Access Keys must be added to /src/include/device_config.h. These HEX strings are taken from your TTN account (it’s free, create one if you don’t have already). To have them available you will need first to create an Application for your LoRa node.
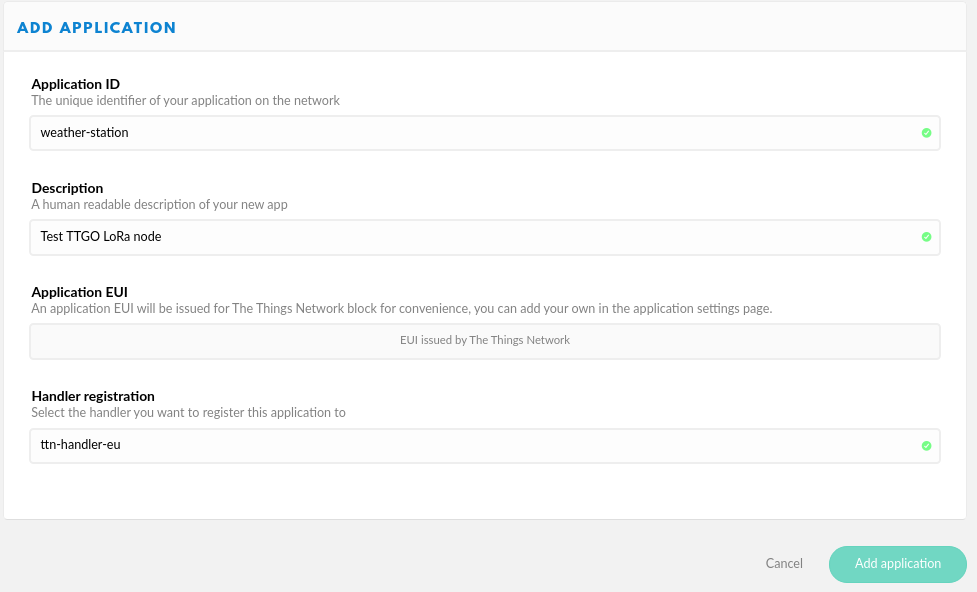
» TTN LoRa node Application
To have your LoRa node sending the sensor Payload into TTN, first create an Application. Goto TTN Website > Log in > Then goto Console. Create an application for your LoRa Node. Click “Applications” and create your test application.
Next, register a Device:
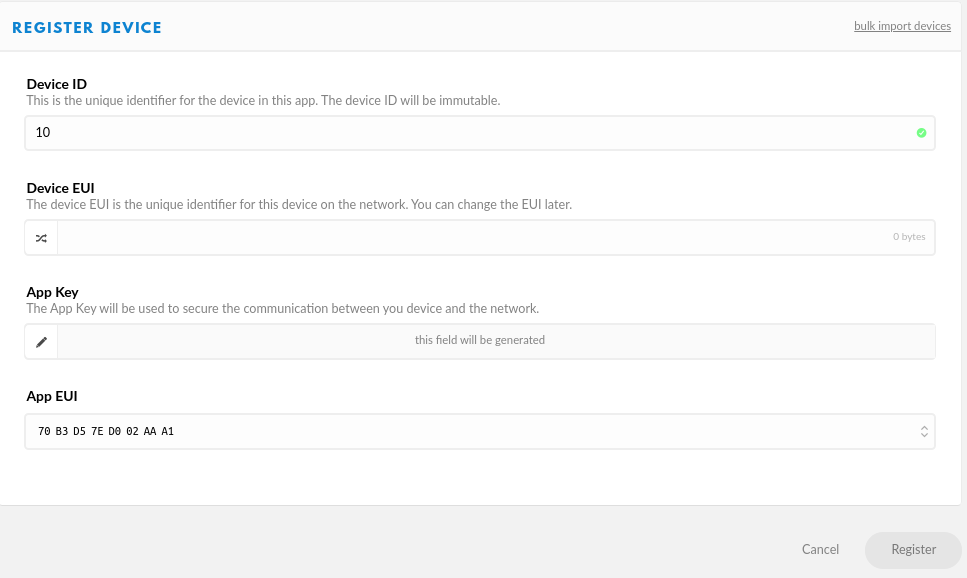
Under device overview, you will see the HEX strings you have to input to /src/include/device_config.h. Pay attention to the lsb and msb, the first two should be lsb and the last one msb. Copy the content of these three strings and paste it under /src/include/device_config.h.

Build and Upload the SW into your TTGO board, connect the antenna, plug in the board to a USB power bank and go somewhere where there should be TTN LoRa coverage. As soon as the LoRa node manages to authenticate into the TTN platform, you should be seeing payload messages from your node showing up under the “Data” tab:
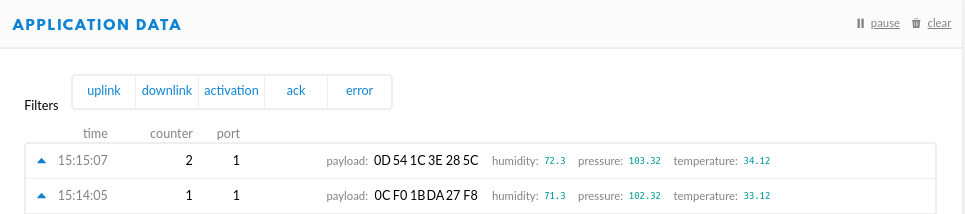
Notice that right after the raw payload, there is the decoded payload message. This is achieved by using a Decode() JavaScript function added under “Payload Formats” tab:
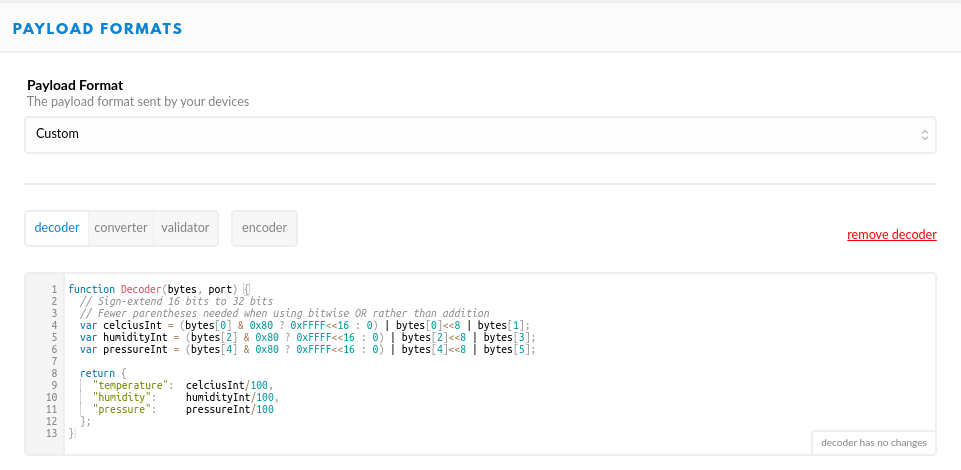
function Decoder(bytes, port) {
  // Sign-extend 16 bits to 32 bits
  // Fewer parentheses needed when using bitwise OR rather than addition
  var celciusInt = (bytes[0] & 0x80 ? 0xFFFF<<16 : 0) | bytes[0]<<8 | bytes[1];
  var humidityInt = (bytes[2] & 0x80 ? 0xFFFF<<16 : 0) | bytes[2]<<8 | bytes[3];
  var pressureInt = (bytes[4] & 0x80 ? 0xFFFF<<16 : 0) | bytes[4]<<8 | bytes[5];

  return {
    "temperature":  celciusInt/100,
    "humidity":     humidityInt/100,
    "pressure":     pressureInt/100
  };
}
» BeagleBone Black Set-up
The idea is to have a Node-RED application connected to the TTN platform, so that whenever a new LoRa payload is captured by a TTN Gateway there will be a ttn uplink event being triggered on the Node-RED app. To run the Node-RED application server I will be using a BeagleBone Black. One could use a raspberry Pi or even a laptop running any OS. Node-RED is cross-platform. The good thing is that the latest Debian image for the BBB comes with Node-RED pre-installed. I have flashed the on-board eMMC chip with the Linux image so I wouldn’t need to boot from the SD card. The procedure I went through is documented here.
» Node-RED App
In order to be able to receive the TTN up-link events under the Node-RED app, we will need to install the TTN nodes for Node-RED. To do that cd into the Node-RED installation dir/ and install “node-red-contrib-ttn”. Also, install the Node-RED dashboard nodes.
$ cd ~/.node-red
$ sudo npm install node-red-contrib-ttn
$ sudo npm install node-red-dashboard
Make sure you have internet connection and git clone the repo once again on the BeagleBone. Then launch node-RED.
$ cd $HOME
$ $ git clone https://github.com/marcoroda/TTGO-LoRa32-weather-station.git
$ cd node-RED
$ node-red node-red-app.json
The node-RED application emulates a web server that you can access within your home network. The IP address is the BBB IP, port 1880 (BBB-ip:1880). The Node-RED application needs to have access to your TTN account.
You will have to copy the “default key” on the bottom of your TTN application page into the ttn-uplink node. With the node-RED up and running, double click on “ttn-uplink” node, then edit ttn app node and paste the accessKey that you got from TTN platform.
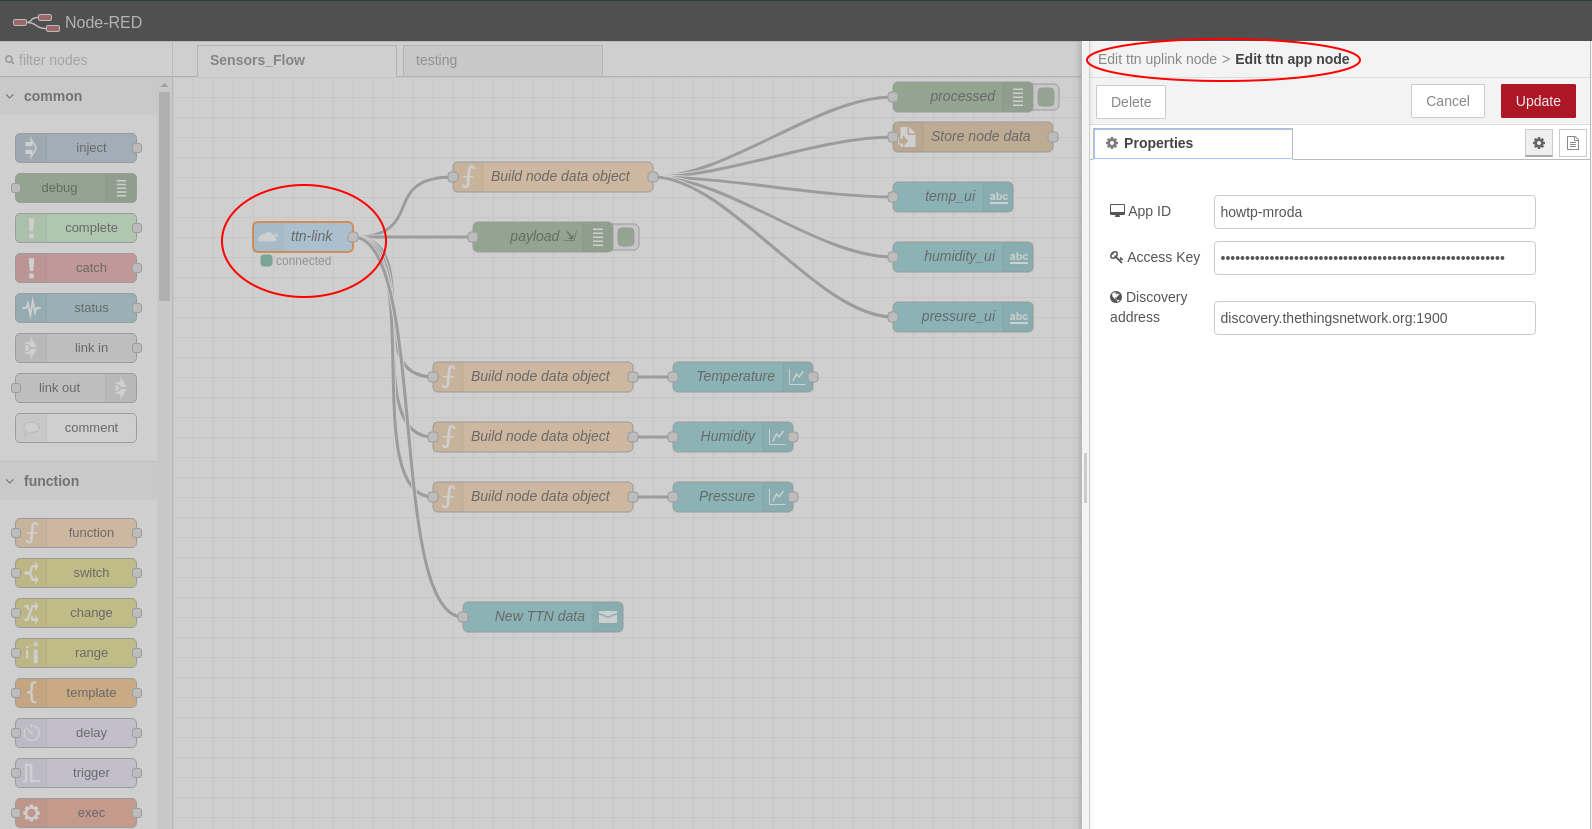
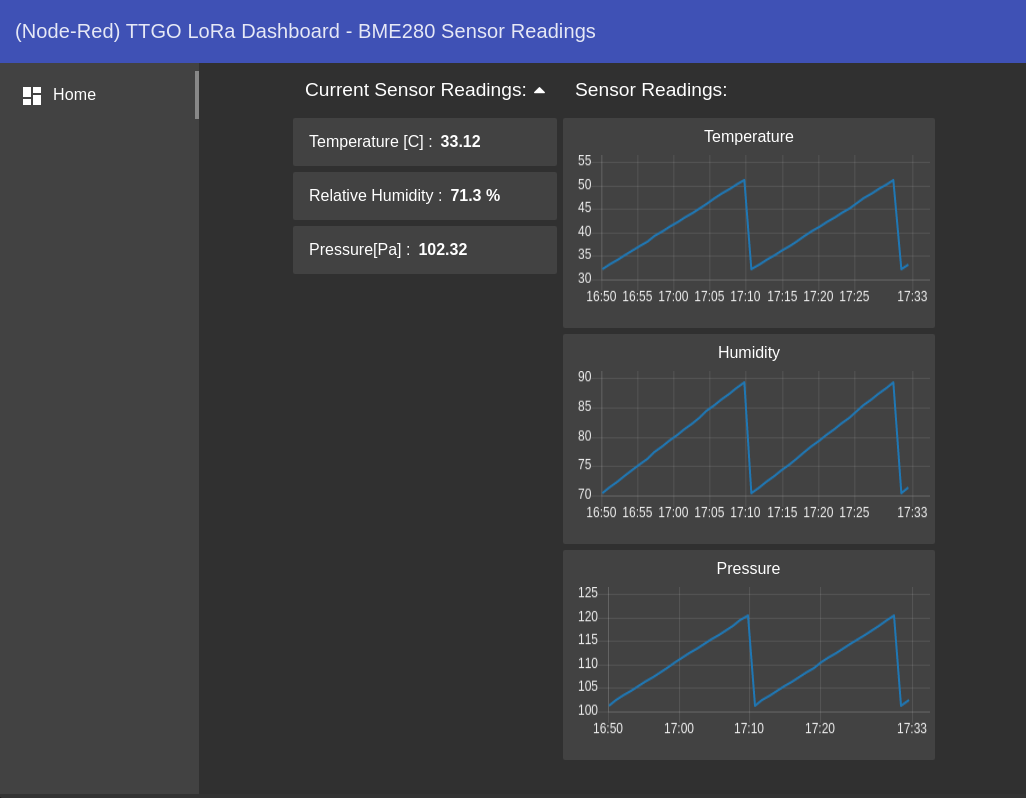
Click Deploy and head to BBB-ip:1880/ui/. If the LoRA node managed to connect to TTN, you should be seeing some values under the node-RED UI. The graph values are dummy for the moment. I have a sawtooth wave being sent over LoRa to simulate the BME280 sensor values.
» Wrapping Up
With this prototype, we have set-up an end-to-end IoT Lora node with The Things Network platform. We have also set up a server side node-RED application that is able to connect to TTN and show the sensor data on a fancy dashboard.
» TODO & Future Devs
As a future work, I plan to:
- custom PCB replacing the TTGO LILY board, probably based on the SAMD21 uController and LoRa transceiver RFM95;
- custom 3D case;
- battery consumption optimization using sleep func();
- Add Solar panel to automatically charge the battery;
- …
Comments
Leave a comment and/or suggestion on this post.